
Contao CMS
Here you can find several How Tos regarding the Contao CMS.
Basic Use
There are some Tutorials on the internet for the basic Usage of Contao as an editor, unfortunately most of them are in German:
Faces Element
We use our own module to provide homogeneous lists with the Members of cfaed, its called the Faces Element.
Adding people into the faces database
To use the Faces Element on your site, at first you have to add the People that should be displayed into the database. To Add People, just navigate to cfaed -> Faces in the menu and click the green button on the top right corner.

Adding a faces list to your site
At first, you have to navigate to the article. There you can create a new element - in the list you have to choose the Faces Element.
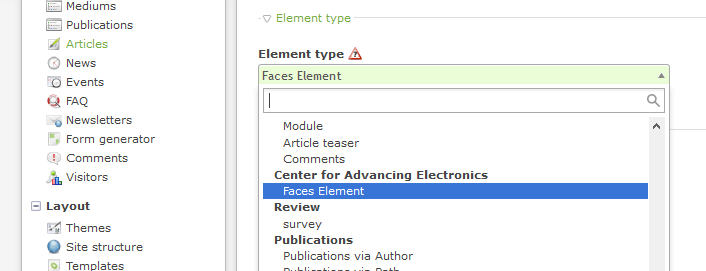
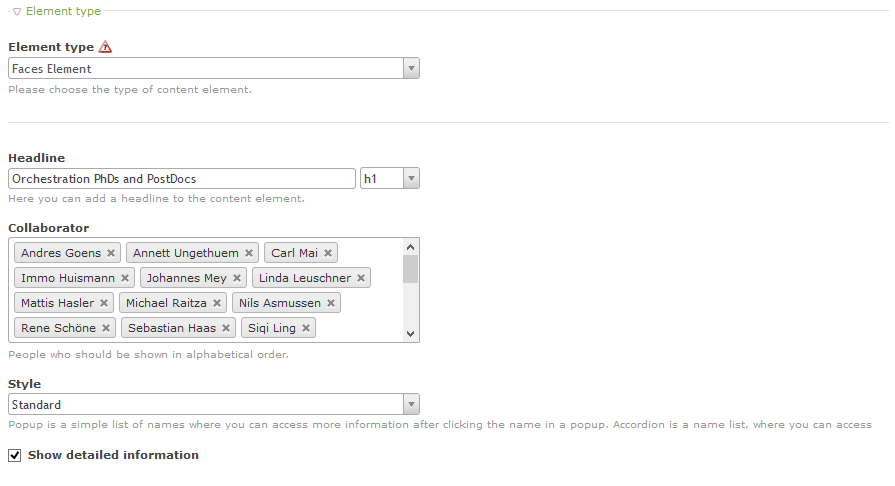
Now you are able to fill out the form fields. When uploading a portrait, please keep in mind that only portraits with the size of 110px width and 155px height are allowed.
Publications
Publications are added to our system by searching via Google Scholar for the term "cfaed" and "center for advancing electronics" and then hand-filtered, missing information like path are added.
It is also possible to add a publication by hand.
For adding or editing a publication you have to navigate to Publications System -> Publications on the Main Menu. Here you can find all publications that are currently in our system. You can select specific authors or paths, so it is easy to find a specific publication.
After selecting a publication or clicking the plus for adding a new one, you have several choices.
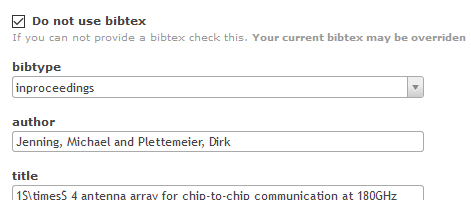
It is possible to add publications without providing a bibtex. The Bibtex will be generated from the given information. This usually works in both directions.
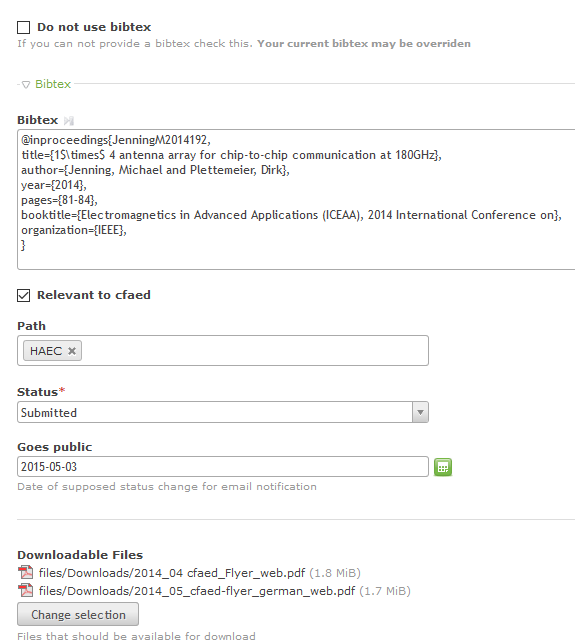
Whatever way you choose, you can provide more information.
- Relevant to cfaed:
- Usually this should be the case. If you add a publication that is not affliated to cfaed, you should remove the tick, e.g. if it is just for your personal page.
- Goes public
- If you expect the status to change, you can insert a date over here. On this day you will once receive an email notification. The system will use the mail address that is associated with your account
- Downloadable Files
- You can add as many files as you want. They will appear in a list labeled by the filename
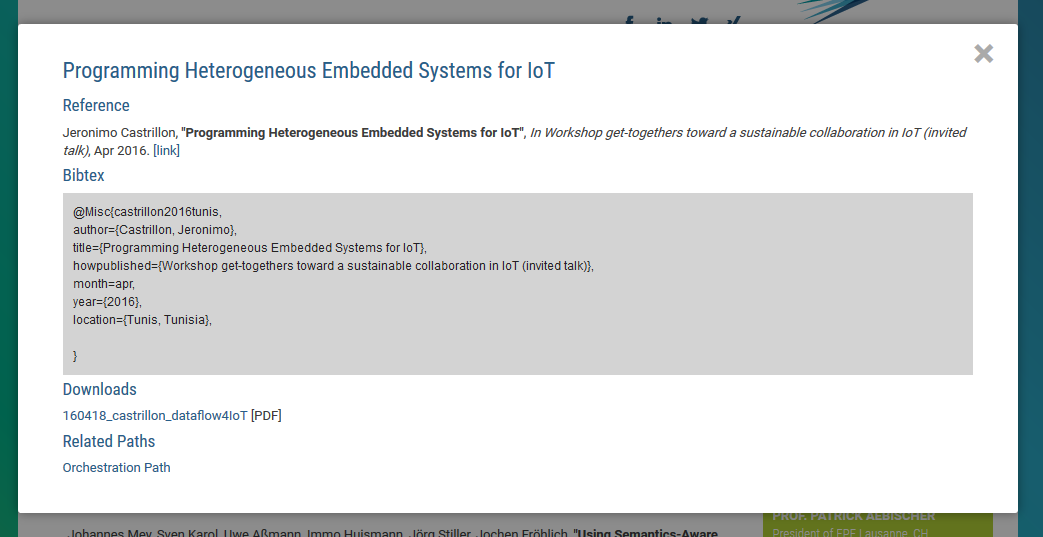
In the end, this is how a single publication may look like.
Adding a Publications Content Element to your page
You have to navigate to the article where publications should be displayed. Now you create a new element as usual. For displaying publications you currently have two options.
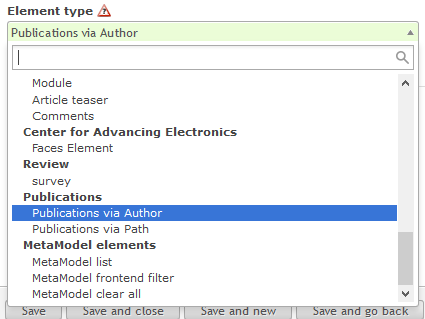
You can have your list filtered either by specifying authors or paths.
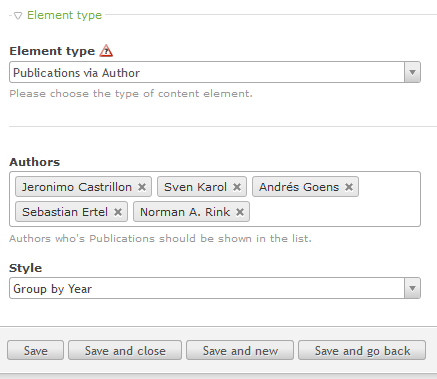
In the end, you have a list of publications on your page.
Solving Problems
If there are any weird errors on the page, e.g. a bad layout or similar, first action should be to clear the Contao internal cache.
Navigate in the Backend to System -> Maintenance and check every checkbox where a cache is cleared (Script cache, layout cache, page cache, etc.). Now submit this action by clicking on "Clear Data".
Unfortunetly, Contao does not support password protected pages. Therefore, it is a bit more complicated to setup a protected area.
tl;dr
- Create user group
- Create user and add to user group
- Create a page, which is just visible for a certain user group
Create a user group
Go to "Member groups" and create a New Group by clicking "New Group".
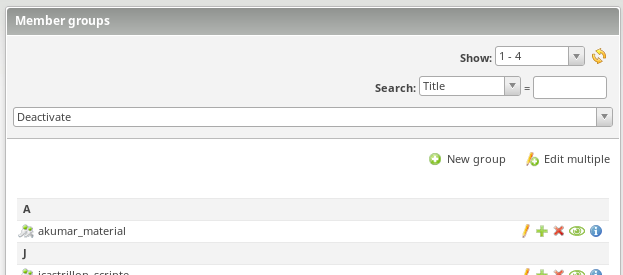
Now, name the group matching your concern. Best is to start with an identifier for your chair / path or similar to avoid overlapping naming. Important is to set the "Redirect on login" to the page, that you want to have protected later. If you did not create it yet, do not forget to change this after creation.
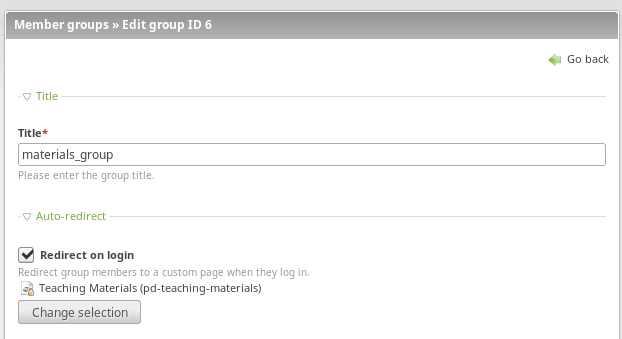
Save the group and continue to create a user, which will belong to this group.
Create user
Now, navigate to "Members" and create a new one. You have to set properties like E-Mail, Surname, etc. This should not be visible to anybody, so you can just fill it with random data. It is important to set the Member Group to the one you created before. Furthermore, do not forget to tick "Allow login" and fill out Username as well as the password.
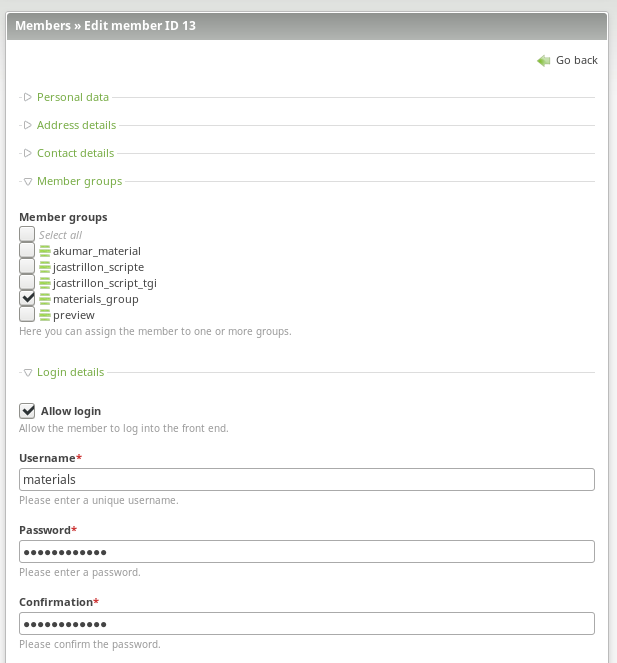
Afterwards, save the user.
Setup protected page
Now you have to navigate to the page you want to have protected in the "Site Structure" and edit its properties. The important part is the "Access protection" property. Here you have to tick "Protect Page" and choose the created member group. If you just created the page, do not forget to set it as "redirect" for your member group.
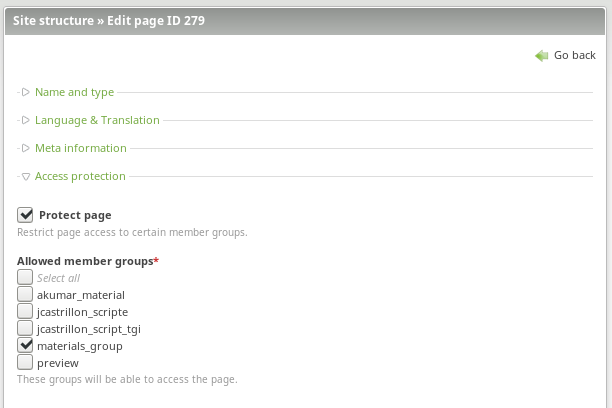
Create login form
Now, go to the article where you want to have the login form to appear. Create a new element and choose "Module" as Element type. Please choose "login_member" as Module. Do NOT change the properties of this module.
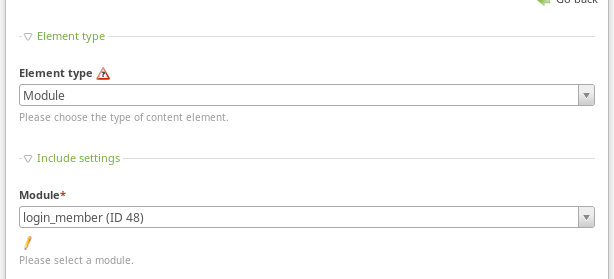
Test your setup
Now go to the article in the frontend, where you put the login form. Try to login with the created user. You should be redirected to your protected page and the content on it should be visible. Please check if the content is visible, if you are not logged in. It should not be visible.

